You spent $15,000 to $30,000 on your All-on-4 implants. Now you need to protect that investment, and the instruction sheet your dentist handed you was probably not detailed enough. I'll give you the complete daily routine that keeps All-on-4 implants healthy for decades.
Here's the thing most patients don't understand at first: All-on-4 cleaning is not like cleaning regular teeth. The prosthetic bridge is fixed to the implants, and there's a small gap between the bridge and your gumline. Food, bacteria, and plaque build up in this gap, and a regular toothbrush can't reach it. If you clean your All-on-4 the same way you brushed your natural teeth, you'll eventually develop a serious infection around the implant posts.
Why All-on-4 Cleaning Is Different
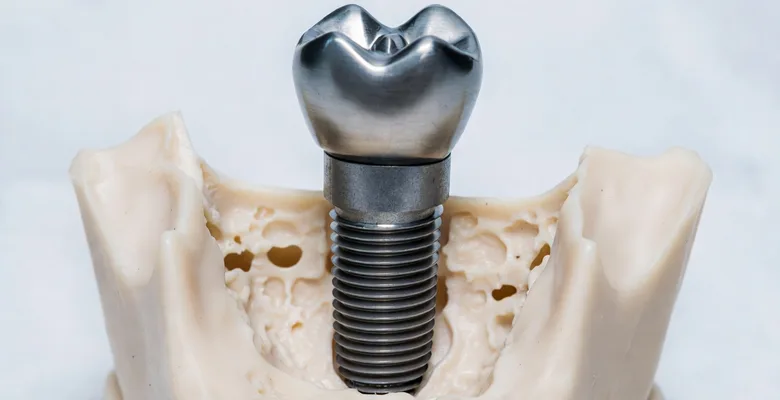
Think of your All-on-4 prosthetic as a bridge suspended over your gums by 4 (or 6) implant posts. There's a space between the bottom of the bridge and the gum tissue — called the tissue surface or intaglio surface. This space is warm, moist, dark, and hard to reach. In other words, it's paradise for bacteria.
With natural teeth, food debris falls between individual teeth and you floss it out. With All-on-4, debris accumulates underneath the connected bridge in areas you can't see. You need specialized tools to clean this space.
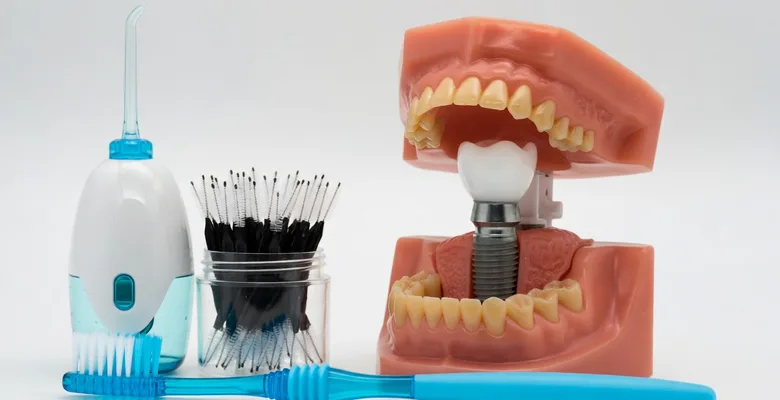
Essential Cleaning Tools
| Tool | What It Does | Cost |
|---|---|---|
| Soft-bristle toothbrush | Cleans outer and biting surfaces | $3–$5 |
| Water flosser (Waterpik) | Flushes under the bridge | $40–$100 |
| Interdental brushes (proxy brushes) | Cleans around implant posts | $5–$8/pack |
| End-tuft brush | Reaches tight spots around posts | $3–$5 |
| Floss threader + implant floss | Wraps around posts under bridge | $5–$8 |
| Non-abrasive toothpaste | Won't scratch prosthetic surface | $5–$8 |
The single most important purchase: A water flosser. If you only buy one thing beyond a toothbrush, make it a Waterpik or similar water flosser. It's the most effective way to flush bacteria and food from under the bridge.
The Daily Cleaning Routine (Step by Step)
Do this twice daily — morning and night. Total time: about 5 to 7 minutes.
Step 1: Brush the outer surfaces (2 minutes)
Use a soft-bristle toothbrush with non-abrasive toothpaste. Brush the front (lip-side), back (tongue-side), and biting surfaces of the prosthetic. Use gentle circular motions. Pay special attention to the junction where the prosthetic meets the gumline — this is where plaque tends to build up first.
An electric toothbrush (Sonicare or Oral-B) works well here and makes the job easier. Use the sensitive/gentle setting.
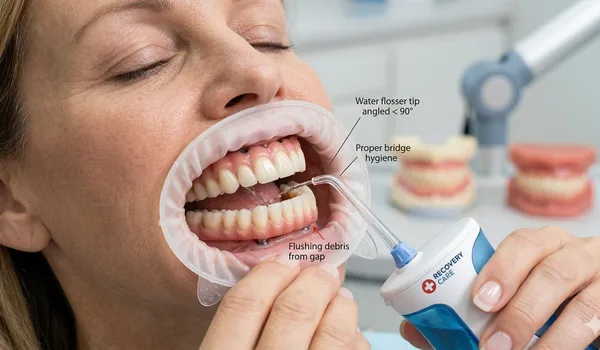
Step 2: Water flosser under the bridge (2 minutes)
Fill the water flosser with warm water (you can add a capful of antimicrobial mouthwash for extra cleaning power). Set it to medium pressure — not the maximum. Aim the tip under the bridge at the gumline and work your way along the entire arch. You'll be surprised how much debris comes out, even when you think your mouth is clean.
Focus on the area around each implant post — direct the water stream around each post from multiple angles. The posts are where bacteria like to colonize.
Step 3: Interdental brushes around the posts (1-2 minutes)
Slide a small interdental brush (like TePe or GUM Proxabrush) under the bridge and gently clean around each implant post. Use a back-and-forth motion. The brush should fit snugly but not require force. Choose the largest size that fits comfortably — different areas may need different sizes.
Step 4: Rinse (30 seconds)
Finish with an antimicrobial mouthwash (chlorhexidine for the first few months post-surgery, then switch to a gentler daily mouthwash like CloSYS or an alcohol-free option). Swish vigorously for 30 seconds to reach areas you might have missed.
How to Clean Under the Bridge
This is the most critical part and where most patients need the most help. Here are your options:
Water flosser (easiest)
The water flosser tip can be angled under the bridge to flush debris. Use the standard tip or the Plaque Seeker tip (designed for implants). Move slowly along the entire arch. The pulsating water dislodges food particles and biofilm that a toothbrush can't reach.
Implant floss with threader
Thread thick implant-specific floss (like TePe Bridge & Implant Floss or Oral-B Superfloss) under the bridge using a floss threader. The thick, spongy section scrubs the underside of the bridge, and you can wrap it around each implant post to clean the post surface. This is the most thorough method but takes practice.
Bottle brushes
Small bottle brushes (similar to interdental brushes but with longer handles) can reach under the bridge from the front or back. Some patients find these easier to maneuver than floss threaders. Brands like Implant Saver make brushes specifically designed for this purpose.
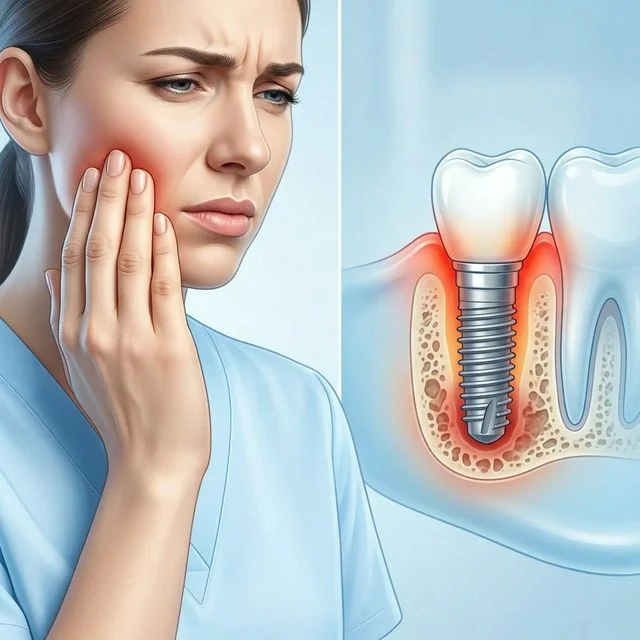
Peri-Implantitis: The Risk of Poor Cleaning
Peri-implantitis is the dental implant version of gum disease. It's an infection of the tissue and bone around the implant posts, and it's the #1 reason All-on-4 implants fail.
How it develops
- Plaque and bacteria build up around the implant posts
- The gum tissue becomes inflamed (peri-implant mucositis — the reversible stage)
- If not treated, the infection spreads to the bone supporting the implant
- Bone deteriorates, the implant loosens, and eventually fails
Warning signs
- Bleeding around the implant when brushing or eating
- Persistent bad breath even after thorough cleaning
- Red, swollen, or tender gum tissue around the posts
- Pus or discharge from around an implant
- The prosthetic feels loose or clicks
If caught early (mucositis stage), it's treatable with professional cleaning and improved home care. If it progresses to bone loss, treatment becomes surgical and the implant may not be saveable. This is why daily cleaning is non-negotiable.
Professional Maintenance Schedule
| Timeframe | What Happens |
|---|---|
| Every 3–4 months | Professional cleaning — hygienist uses special instruments (no metal on titanium) to clean around implant posts and under the bridge |
| Once a year | X-rays to check bone levels around implant posts |
| Every 1–2 years | Prosthetic may be removed for deep cleaning (some clinics do this; depends on the design) |
| Every 5–10 years | Prosthetic may need refurbishment or replacement (normal wear) |
Important: Not every dental hygienist is trained in implant maintenance. Make sure your dental office has experience with All-on-4 patients. They should use plastic or titanium scalers (never steel instruments on implant posts) and check probing depths around each post.
Common Mistakes to Avoid
- Only brushing the visible surfaces: The bridge top looks clean, but underneath is a different story. Under-bridge cleaning is more important than brushing.
- Using abrasive toothpaste: Whitening toothpaste, charcoal paste, and baking soda can scratch the prosthetic surface. Use a gentle, non-abrasive paste.
- Metal instruments at the dentist: If your hygienist uses steel scalers on titanium implant posts, find a new hygienist. Steel scratches titanium, creating grooves where bacteria colonize.
- Skipping the water flosser: A toothbrush alone cannot clean under the bridge. Period. The water flosser is not optional — it's essential.
- Not going to maintenance appointments: Professional cleanings every 3–4 months are critical for catching peri-implantitis early.
- Smoking: Dramatically increases the risk of peri-implantitis and implant failure. If you smoke, quitting is the single best thing you can do for your implant health.
Frequently Asked Questions
Learn more about dental implants:
Read Our Complete Dental Implants Guide →